
In the process of plant maintenance, repotting and potting are common operations. However, many people find that this seemingly simple process often leads to poor growth or even death of plants. So, how can we correctly carry out repotting and potting to ensure the healthy growth of plants?
First of all, we need to understand why plants are prone to death when being repotted and potted. An important reason is root damage. During the operation, the plant's root system will inevitably be damaged to a certain extent. If not handled properly, the plant will find it difficult to absorb enough water and nutrients from the soil, thus affecting growth. In addition, the new soil environment may be quite different from the original one, such as acidity and alkalinity, fertility, and air permeability. If the plant cannot adapt quickly, it will also lead to growth problems.
So, what is the correct method for repotting and potting?
Step 1: Choose the right time. Generally speaking, spring and autumn are the best times for most plants to be repotted and potted. Because the climate in these two seasons is suitable and plants grow vigorously, they can adapt to the new environment more quickly. However, it should also be judged specifically according to the growth habits of different plants. For example, some plants are also suitable for repotting after the summer dormancy ends.
Step 2: Prepare the necessary tools and materials. This includes new flowerpots of appropriate size, loose and fertile soil, shovels, scissors, etc. The new flowerpot should be a little larger than the original one to provide enough growth space for the plant's root system. The soil can be selected from special flower nutrition soil or prepared by oneself. Usually, leaf mold soil, peat soil, perlite, etc. are mixed in a certain proportion.
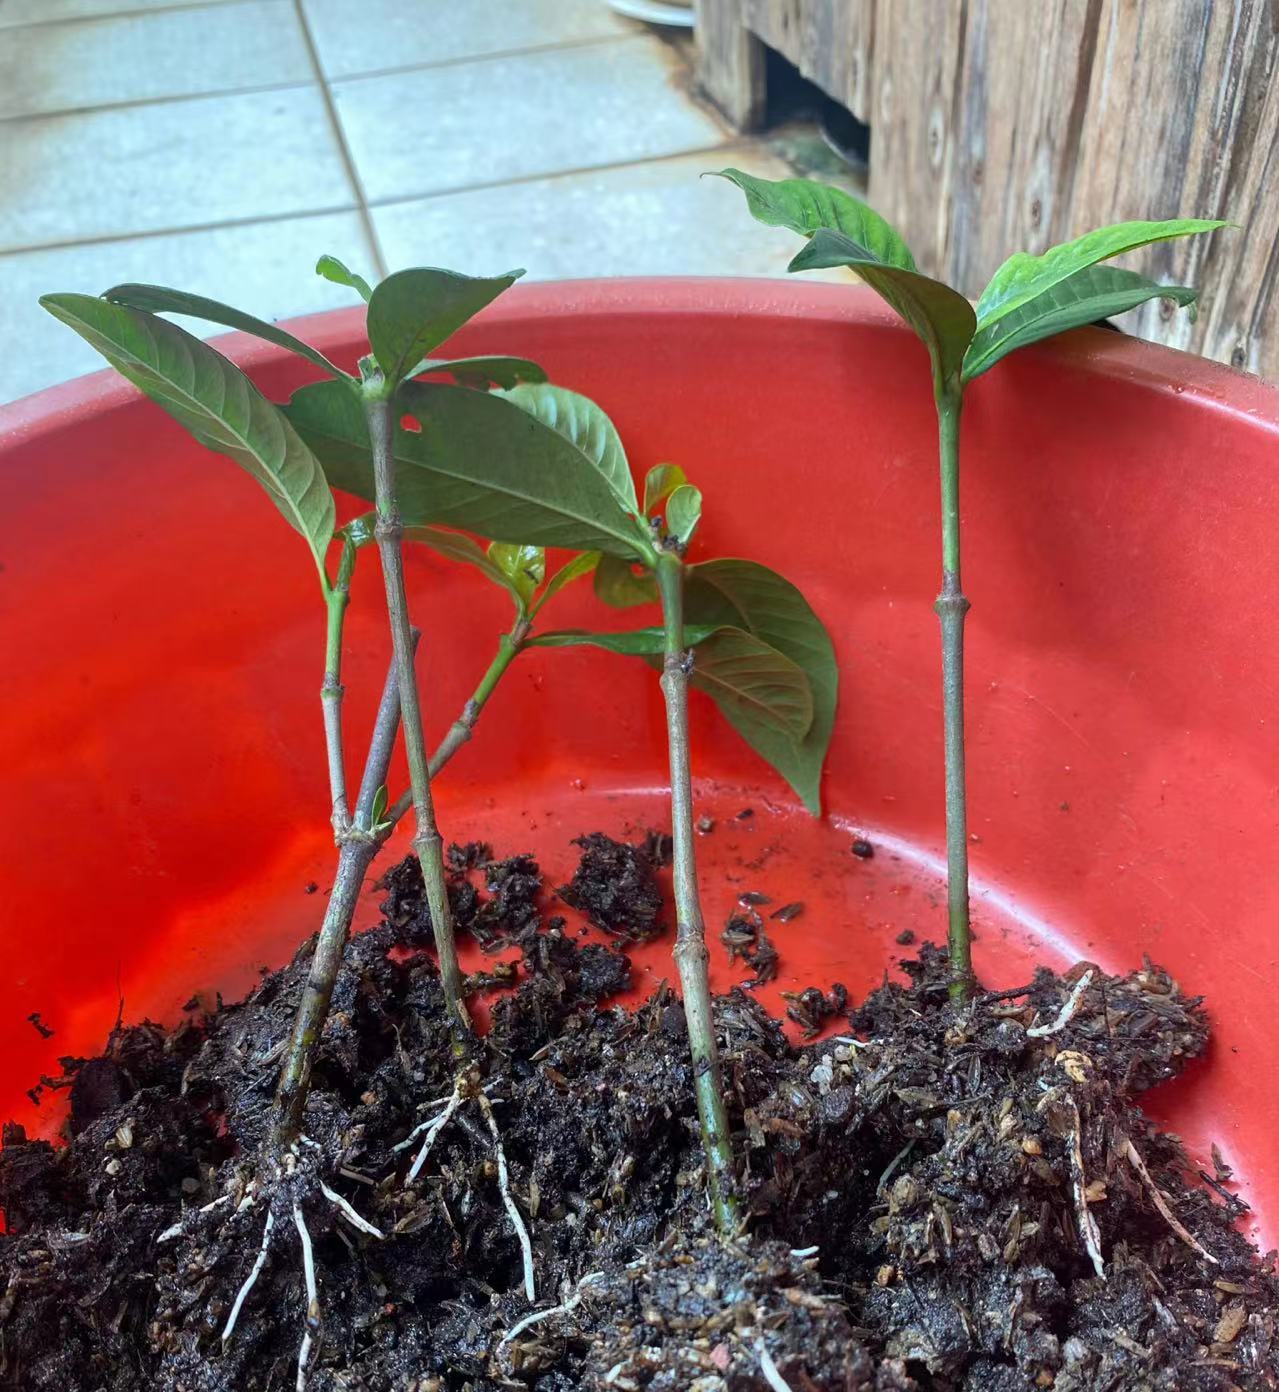
Step 3: Properly treat the plant. Before repotting or potting, stop watering a few days in advance to let the soil dry slightly so that the plant can be taken out of the original pot easily. When taking out the plant, operate carefully and try to avoid damaging the root system as much as possible. If the root system is too tightly intertwined, it can be gently cut open with scissors, but be careful not to cut the main root. For roots with pests, diseases or rot, they should be trimmed off in time and disinfect the wound by applying fungicides such as carbendazim.
Step 4: Put the plant into the new pot. Lay a layer of drainage layer at the bottom of the new flowerpot, such as ceramsite, broken tiles, etc., to prevent root rot caused by water accumulation. Then add an appropriate amount of new soil, put the plant in the center of the flowerpot, straighten it up and adjust the position to make the root system naturally stretch. Then, gradually fill the soil and gently compact it at the same time to ensure that the plant is stable and the root system is in full contact with the soil. But don't press too hard to avoid affecting the air permeability of the soil.
Step 5: Watering and maintenance. After repotting or potting is completed, water thoroughly in time, which is called setting root water. Water until the water flows out from the drainage hole at the bottom of the flowerpot. Then place the plant in a cool and ventilated place, avoid direct sunlight, and let it adapt to the new environment. Do not fertilize before the plant resumes growth to avoid fertilizer damage.
In addition, there are some details that need attention. For example, during the repotting process, if the original soil is severely compacted, some old soil can be gently removed, but not too much to avoid damaging too many root systems. For some large plants, some organic fertilizers can be added to the new soil during repotting to provide sufficient nutrients.
Repotting and potting plants require us to operate carefully and patiently and adjust according to the characteristics of different plants. The correct method of repotting and potting can help plants grow better.
How to repot plants?
Share with
Tagged in :
Leave a Reply